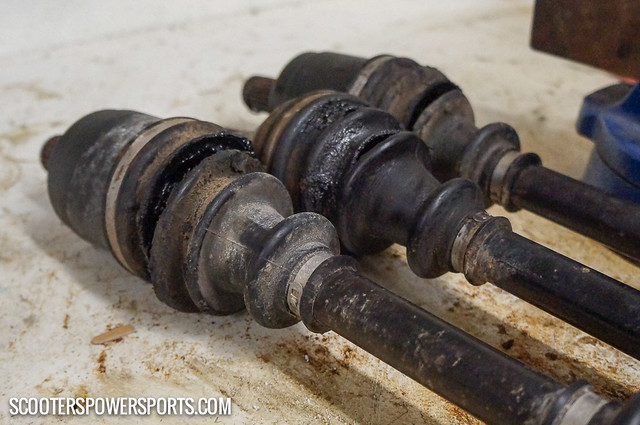
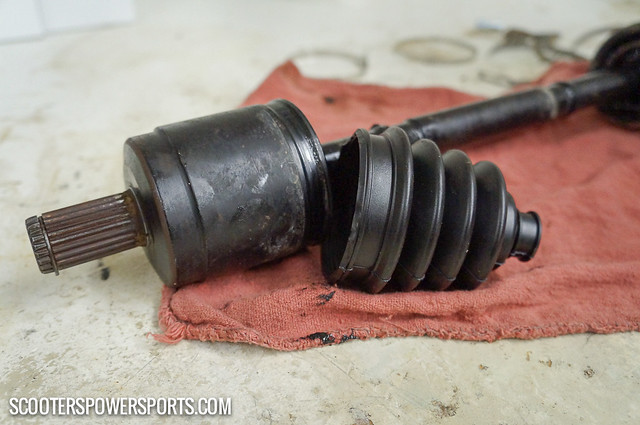
It’s no secret that the biggest down fall to owning and ATV or UTV is the maintenance. I’ve found that one of the dirtiest (and unfortunately one of the most common) jobs is replacing a worn CV boot. CV boots are usually just rubber, so they rip pretty easily. Even if you’re not the type to get into brush or crawl on rocks, you’ll still need to keep an eye on these boots because they’re susceptible to weathering and dry rot. If this boot fails due to a tear or rot, it will throw moly grease everywhere. Once this sticky grease starts leaking out from around from around the CV joint, the risk of damaging the joint or entire shaft are increased. Since CV boots kits are so affordable, (and moly grease is so messy), we recommend that they are replaced at the very first sign of wear.
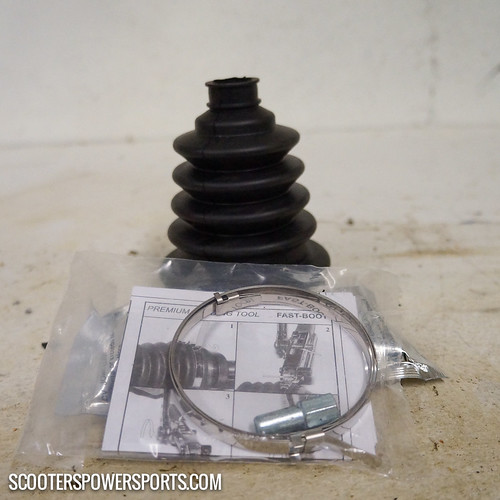
Unfortunately, replacing a CV boot is one of those tasks that is not nearly as easy in practice as it is on paper. Generally, you’ll need to remove the axle (aka CV shaft), then remove the CV joint. Sometimes you’ll get lucky and this won’t be so bad. Most of the time you’ll fight with removing the axle from the differential. Like I said, it’s easy on paper. Not so much in practice. Bear in mind, we’re a shop, so we remove and replace CV boots all the time. So when we found a company that claimed to make a tool that would allow us to replace a CV boot without removing the axle or the joint, we were intrigued. The Quick-Shot CV Boot Installation Tool Kit from Norrec Industries comes with everything you need to install one of their Fast-Boot universal CV boots. The kit includes the Quick-Shot tool, a banding tool, knife, and instructions. The only other item you'll need to operate the Quick-Shot is an air compressor. Not gonna lie here, this is a scary looking tool. But we’ll try anything once, maybe even twice. When our Quick-Shot kit came in, we were excited to get to work.

The Fast-Boot CV Boot Kit includes the rubber boot, moly grease, clamps, and even a banding tool. We thought that was a pretty nice touch since the banding tool hasn’t been included in any of the other brands of boots we’ve tried.
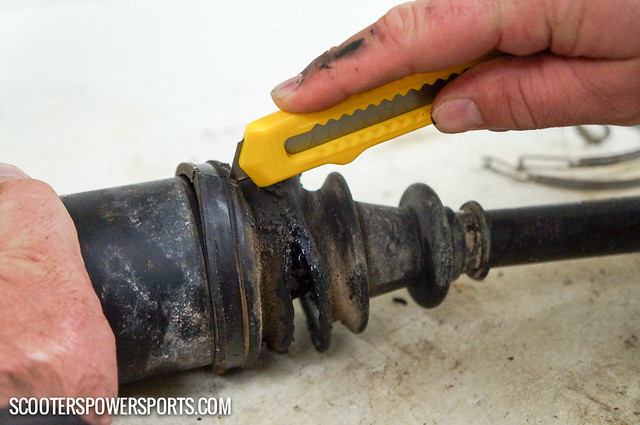
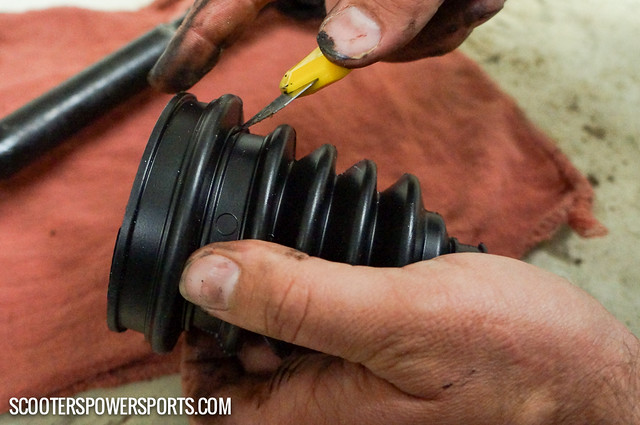
Since this is a universal boot, it does have two markers on the larger end to accommodate varying joint sizes. Depending on the application, you may need to trim the boot down a size to fit properly. Hence, the utility knife included with the Quick-Shot. Since most vehicles have at least two different CV boots (some even have four different boots!), the Fast-Boot is great for a universal spare. It can be used on any axle and you just reduced your field kit from possibly four CV boot kits and a banding tool to one or two Fast-Boot kits. We generally only pack one, but if we were running with all stock boots on our rig, we’d probably pack two Fast-Boot kits just to be safe. Now we could have tried this tool out on any make or model of ATV, but since the Fast-Boot kit was the ONLY CV boot kit listed to fit a Bush Hog, it seemed like a perfect match. This particular ATV needed several CV boots replaced. So while we’re only going to walk through the process of changing one, we were fortunate enough to get a ton of practice. Not that you need much - Norrec Industries has designed the Quick-Shot and Fast-Boot kits to make swapping a CV boot a relatively straightforward process. The first step is always to cut off the old boots and clamps.
Since we are not taking these axles apart, I clean as much of the old grease out as possible.
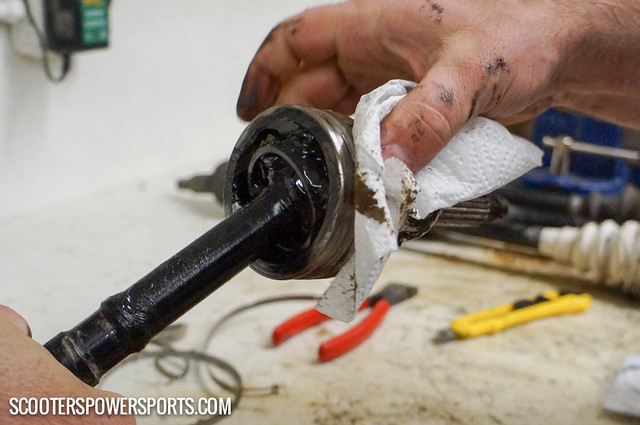
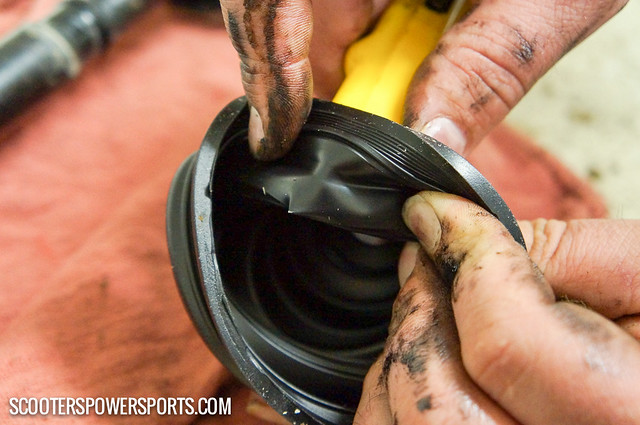
While the old boots were worn out, they really weren’t terrible - there was no dirt or water present. If there had been, I would recommend cleaning them with a solvent or parts cleaner of some kind before putting in the new grease. Once the old grease is cleaned out, you’ll want to take a look at the CV joint and the Fast-Boot. Since the Fast-Boot is a universal kit, it is designed to be cut to size. After comparing our CV joint and the Fast-Boot, I determined that the large ring on the Fast-Boot was too big and would need to be cut to size.
Modifying the boot to fit was surprisingly hard to do. The Quick-Shot came with a brand new utility knife but it would hardly cut the Fast-Boot. Now that we’ve been installing Fast-Boots for a few months, it has gotten easier. But before you assume this is a point against Fast-Boot, we encourage you to keep reading…
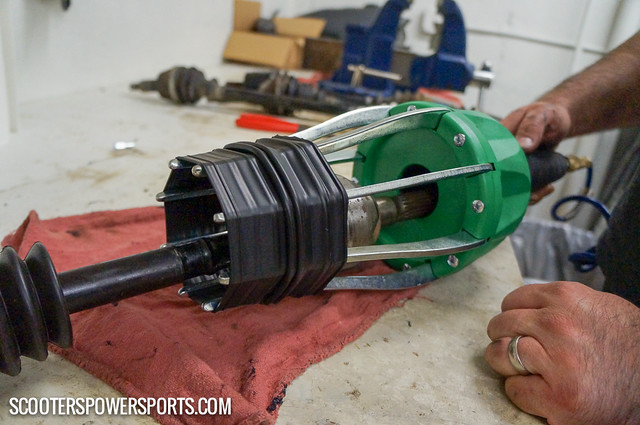
Once we got the Fast-Boot cut to size, we were pretty excited to try out the Quick-Shot. Following the instructions, we slid the Fast-Boot on to the end of the Quick-Shot until just the tips stuck out.
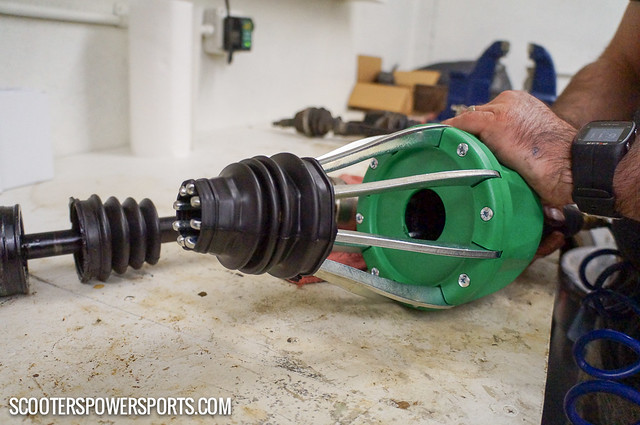
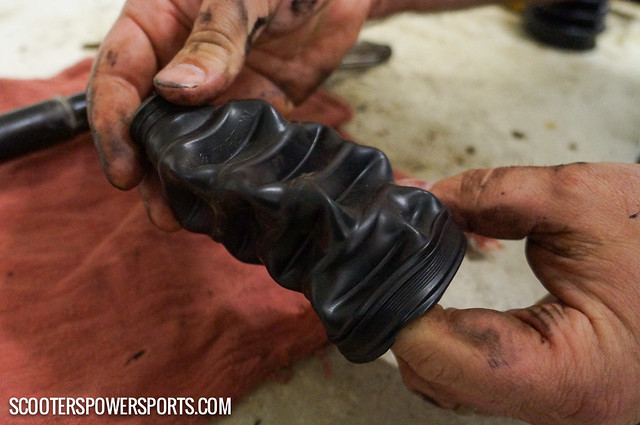
Then we hooked up the air and pushed the button on the Quick-Shot to begin stretching the Fast-Boot. We were amazed at just how much these boots stretch. It’s worth noting that despite having worked with the Quick-Shot and Fast-Boot combo for several months, this process is still guaranteed to draw an audience in the shop.
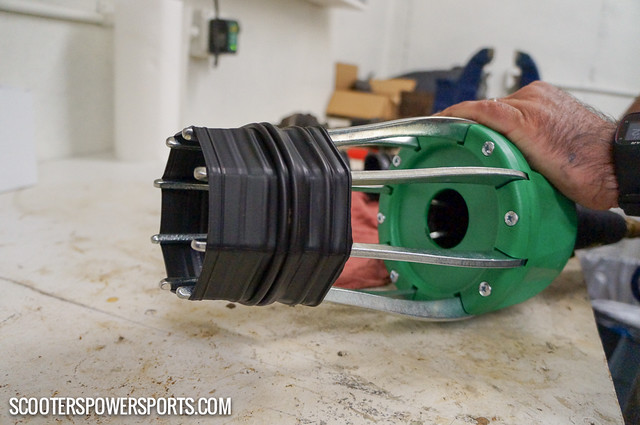
Seeing the Fast-Boot stretch like this was amazing and it made us think - if this boot can stretch like that on this tool, this boot is going to be so much more durable on the trail when it’s being poked with brush and forced to conform to the many angles of a CV joint. (We later tested this theory by piercing the boot with a box knife.)
After the boot was stretched, we slid it over the CV joint, hit the release button on the Quick-Shot, and the tool and Fast-Boot shrunk back to normal. 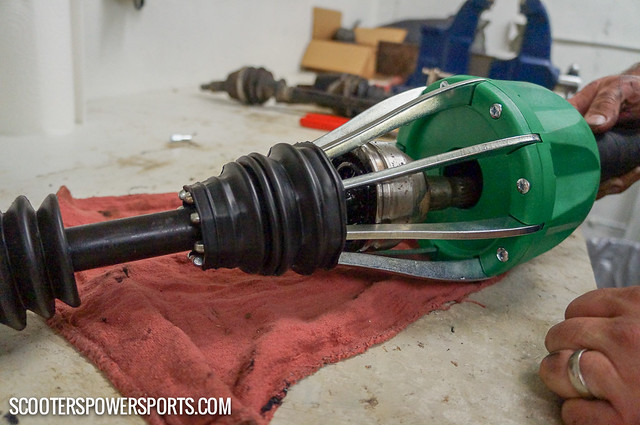 When you’re done, the Fast-Boot slides off the Quick-Shot. The tines on the Quick-Shot open back up so that the tool can slide right off the shaft.
 Now that was simple. All that was left now was to fill the joint with grease and install the clamps.
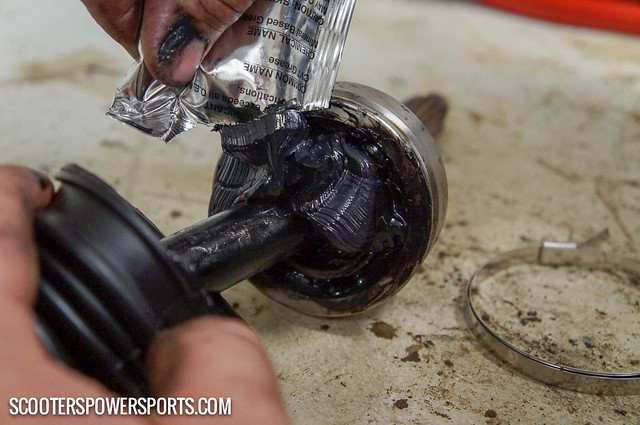
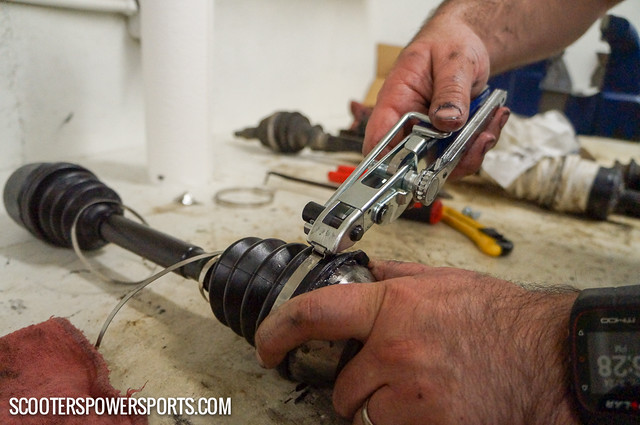
The Fast-Boot kit comes with both the grease and the clamps, so you’re covered there. The Quick-Shot comes with a premium banding tool, so if you get both tools, you’re pretty well covered the next time you need to replace a CV boot.
Now you may be wondering, what about the inner boot? What if the axle is still on the unit or if that end is too big for the Quick-Shot to slide over? Well you just turn the Fast-Boot inside out...
With the Fast-Boot inside out, you’ll follow the same process as above. Once the boot is on the shaft, you turn it inside out again (right side in?) so that the Fast-Boot sits correctly on the CV joint. Bam - just like that you have the inner boot installed on the shaft. 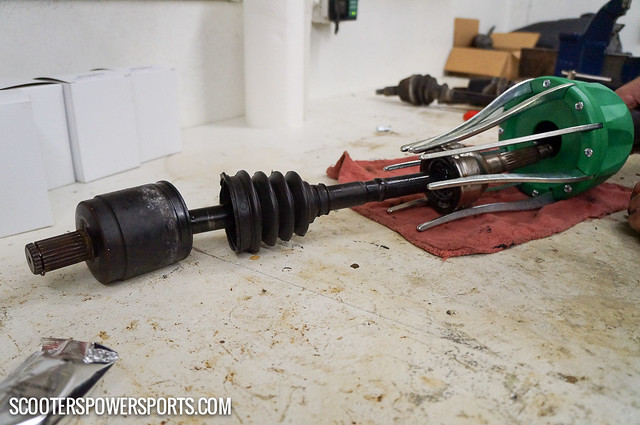
We have been highly impressed with both the Quick-Shot tool and the Fast-Boot CV Boot Kit. It has become our go-to shop tool. In fact, we’ve stopped installing other CV Boot kits in favor of the Fast-Boot kit. Admittedly, the Fast-Boot kit is a little higher than a normal aftermarket CV boot kit. As of the date of this post, the All-Balls custom fitted CV boot kits that we carry retail at $13.25 whereas the Fast-Boot universal kit retails at $17.99. While the price is a little higher, bare in mind that with the Fast-Boot kit, you’ll only ever need one type. With a custom fitted kit, you may need up to four different CV boots depending the make and model of your rig.
The 2006 Yamaha Grizzly 600 has three different CV boot part numbers (the front inner and rear outer are the same, but the front outer, and rear inner are all different. On a 2006 Kawasaki Brute Force 750, all four CV boots are different. Even the 2015 Polaris Ranger 900 XP has three different CV boot part numbers. The Fast-Boot universal kit from Norrec Industries effectively replaces each of these part numbers with just one kit.
It’s important to note that the Quick-Shot is designed to use the Fast-Boot CV boot kits. While you can use the Fast-Boot without the Quick-Shot,you CANNOT use the Quick-Shot with any other brand of CV boot. The reason for this (and the reason we began recommending the Fast-Boot kits over traditional “fitted” CV boots) is that the rubber used by Norrec is designed specifically to stretch out OVER the CV joint. Because the rubber is formulated to stretch, we’ve found that the Fast-Boot is significantly more durable than the fitted boots that we previously recommended. Norrec Industries warns that using the Quick-Shot with other boots may cause the boot to tear or cause damage to the arms on the Quick-Shot. When you hold the Fast-Boot in one hand and a typical aftermarket CV boot the other, the difference in pliability is obvious. While it’s common to tear a boot when riding through brush, it took a decent amount of pressure to pierce the Fast-Boot with a box knife.
When we recommend the Fast-Boot kit to a customer, they inevitably ask about for a price on the Quick-Shot. The Quick-Shot retails at $277.99 - if you change one CV boot a year, we can’t really recommend it. But for a shop environment where you replace multiple CV boots on a routine basis, we can’t recommend it enough. The Quick-Shot has saved us more time than we can count. After using this tool for a few months, we’re now able to change both boots on an axle in about 15 minutes. That includes cutting off the old boots, removing the grease, and installing the new boots and new grease. When we used the All-Balls CV boots, it took about 45 minutes to replace both boots on an axle. So all told, the Quick-Shot has saved us about 30 minutes per axle. If you replace several CV boots a month, I highly recommend investing in the Quick-Shot CV Boot Tool. Even if you do not use the Quick-Shot, the Fast-Boot CV Boot Kits are a great replacement. I normally don’t recommend universal items because the Fast-Boot kit was designed to work with the Quick-Shot, it is significantly tougher than other aftermarket CV boots. When you combine the extreme durability with the miniscule price difference and the fact that one Fast-Boot kit could potentially replace four aftermarket kits, the choice becomes a no brainer. With or without the Quick-Shot, the Fast-Boot kit is an amazing value and has quickly become the only CV boot kit we carry in our field kit.
Our very own Air Filter Relocation kit for ODES UTVS. Designed and manufactured by Scooter's Powersports. Unlike some ODES Air Filter Relocation K...
View full details
If the noise inside the cab of your ODES UTV has ever bothered you, this. is your solution. Now you can get one of our best selling shop services a...
View full details
Designed to move the voltage regulator from under the hood to under the seat. Requested by you and built by Scooter's Powersports. Allows for elimi...
View full details

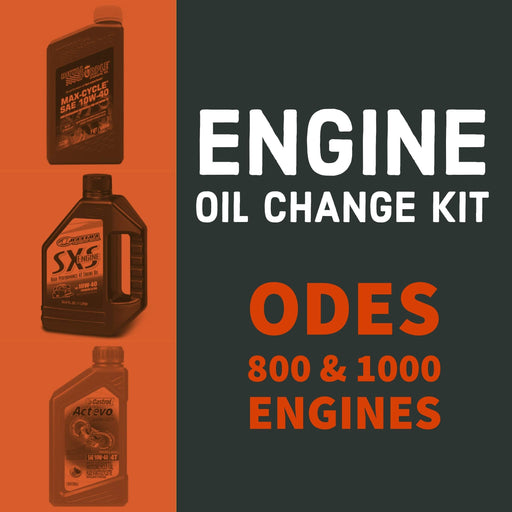
ODES Industries recommends an engine oil change at 25-hours of run time or 1000 miles. (We won’t tell if you turn that down to once every 50-hours ...
View full details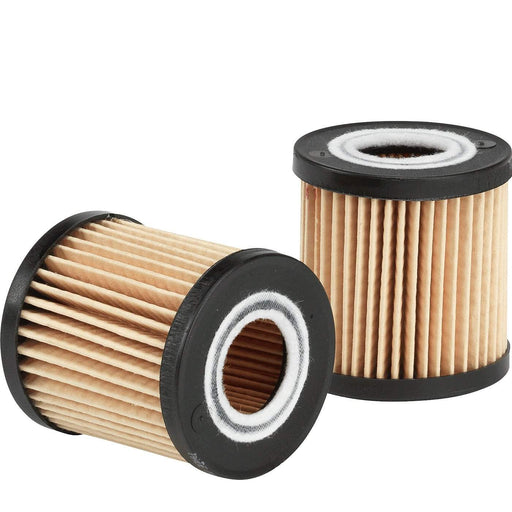
High-performance aftermarket ODES oil filter. Compatible with 800cc and 1000cc ODES engines. Be sure to select your make and model before adding to...
View full details
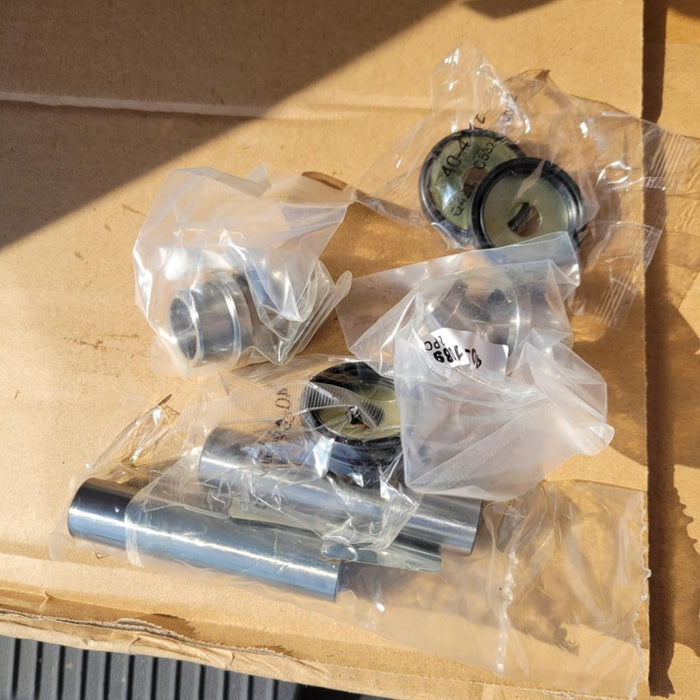
Pivot Works wheel bearing kit for 2012+ 800cc and 1000cc UTVs from ODES Industries. Fitment includes the Short Travel (Standard) suspension and the...
View full details
Our very own Air Filter Relocation kit for ODES UTVS. Designed and manufactured by Scooter's Powersports. Unlike some ODES Air Filter Relocation K...
View full detailsOEM air filter for ODES 800cc engines. Vehicle Fitment This part is compatible with the following vehicles 2012+ ODES Dominator 800 2015+ ODES Dom...
View full details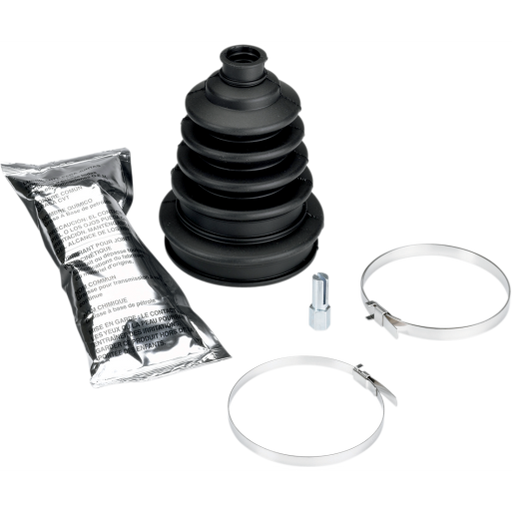
Extremely heavy duty CV boot that fits virtually all ATVs and UTVs. Additional rib to allow boot to expand for larger joints Improved clamp retain...
View full details
ODES ball joint kit for 800cc and 1000cc ODES UTVs. ODES Ball Joint Kit Includes (1) Ball joint (1) Circlip (1) Cotter pin (1) Nut Each kit provi...
View full details